How to Pressure Jet Wash Sandstone Like a Pro
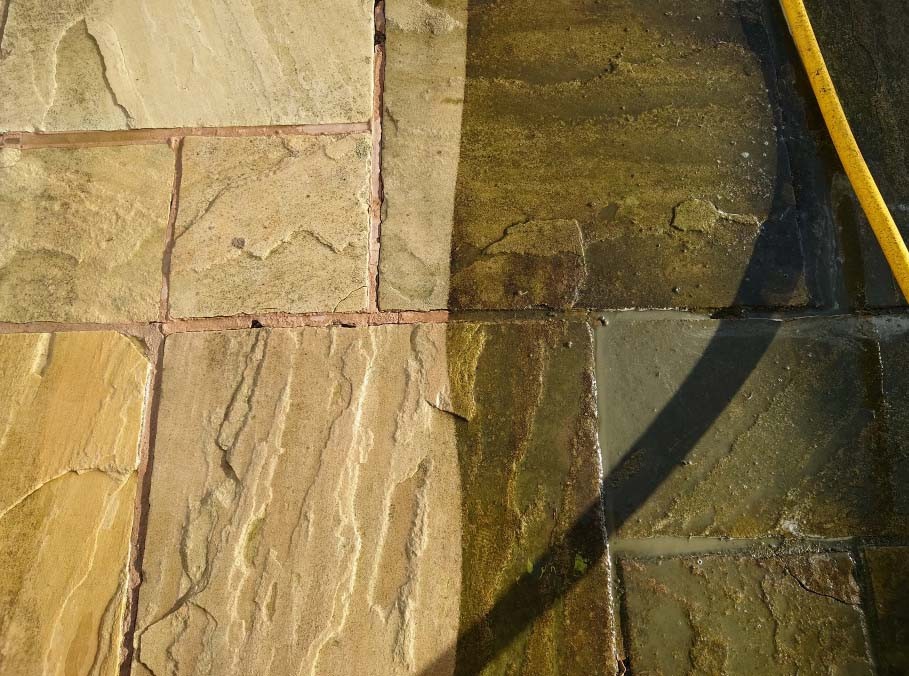
Sandstone is a beautiful and popular choice for patios, driveways, and outdoor spaces due to its natural appearance and durability. However, over time, dirt, algae, and other contaminants can make your sandstone surfaces look tired and unkempt. Pressure jet washing is an effective way to restore the beauty of your sandstone, but it must be done correctly to avoid damage. This guide will walk you through the steps of pressure jet washing sandstone like a pro, with tips from Balo Jetwash Wolverhampton.
Understanding Sandstone
Before diving into the pressure washing process, it's important to understand the nature of sandstone. Sandstone is a sedimentary rock composed of sand-sized mineral particles. It is relatively porous, which means it can absorb water and other liquids. This porosity makes sandstone susceptible to staining and biological growth, but it also means that high-pressure washing can easily damage the surface if not done correctly.
Why Proper Technique Matters
Improper pressure washing can cause irreversible damage to sandstone. Using too much pressure or the wrong nozzle can strip away the surface layer, leaving the stone rough and prone to further damage. Additionally, incorrect washing techniques can fail to remove deeper stains and biological growth, leading to a surface that looks clean initially but quickly becomes dirty again. By following the proper techniques, you can ensure a thorough clean that preserves the integrity of your sandstone.
Equipment and Materials Needed
To pressure wash sandstone effectively, you will need the following equipment and materials:
- Pressure Washer: Choose a pressure washer with adjustable pressure settings.
- Nozzles: Use wide nozzles to spread the pressure over a larger area and avoid turbo nozzles which concentrate the pressure in one spot.
- Biocide Cleaning Detergent: A biocide cleaning detergent helps to kill algae, moss, and other biological growth, ensuring a longer-lasting clean.
- Safety Gear: Gloves, goggles, and waterproof clothing to protect yourself from debris and cleaning agents.
- Broom or Brush: For pre-cleaning loose debris.
Step-by-Step Guide to Pressure Jet Washing Sandstone
Step 1: Preparation
Before you begin, it's important to prepare both the sandstone surface and yourself:
- Clear the Area: Remove any furniture, pots, or other items from the sandstone surface.
- Sweep the Surface: Use a broom or brush to remove loose dirt and debris.
- Protect Nearby Plants and Surfaces: Cover any plants or surfaces that you don't want to be affected by the cleaning detergent or water spray.
Biocide cleaning detergent is crucial for effectively removing biological growth such as algae and moss. Here's how to apply it:
- Mix the Detergent: Follow the manufacturer's instructions to mix the biocide cleaning detergent with water.
- Apply the Detergent: Use a garden sprayer or the detergent dispenser on your pressure washer to evenly apply the solution to the sandstone surface. Ensure full coverage, particularly in areas with visible biological growth.
- Let It Sit: Allow the detergent to sit for the recommended time, usually around 15-30 minutes. This gives it time to penetrate and kill the biological growth.
Properly setting up your pressure washer is crucial to avoid damaging the sandstone:
- Choose the Right Nozzle: Select a wide-angle nozzle (25 to 40 degrees) to spread the pressure over a larger area. Avoid turbo nozzles, as they concentrate the pressure in a small area, increasing the risk of damage.
- Adjust the Pressure: Set the pressure washer to a lower pressure setting. Generally, a range of 800 to 1200 PSI is sufficient for cleaning sandstone without causing damage.
Now that you've prepared the surface and set up your equipment, it's time to start pressure washing:
- Start at a Distance: Begin by holding the nozzle at least 12-18 inches away from the sandstone surface. You can move closer if necessary, but never closer than 6 inches to avoid damaging the stone.
- Test a Small Area: Start with a small, inconspicuous area to ensure the pressure setting and nozzle are suitable.
- Use a Consistent Motion: Move the nozzle in a consistent, sweeping motion, overlapping each pass to ensure even cleaning. Avoid focusing the spray in one spot for too long.
- Work in Sections: Clean the sandstone in manageable sections, ensuring each section is fully cleaned before moving on to the next.
After pressure washing, it's important to rinse the surface and inspect your work:
- Rinse Thoroughly: Use the pressure washer or a garden hose to rinse away any remaining detergent and debris. Ensure all traces of the biocide detergent are removed.
- Inspect the Surface: Check the sandstone for any missed spots or areas that need additional cleaning. Repeat the washing process in these areas if necessary.
Proper post-cleaning care can help maintain the cleanliness and integrity of your sandstone:
- Allow to Dry: Let the sandstone surface dry completely. This may take several hours depending on the weather conditions.
- Apply a Sealant (Optional): Applying a sealant can help protect the sandstone from future staining and biological growth. Choose a breathable sealant designed for use on natural stone.
- Regular Maintenance: Regularly sweep and rinse your sandstone surfaces to prevent the buildup of dirt and biological growth.
Tips from Balo Jetwash Wolverhampton
Here are some expert tips from Balo Jetwash Wolverhampton to help you achieve the best results when pressure washing sandstone:
- Use Lower Pressure First: Always start with the lowest effective pressure setting and increase only if necessary. This minimizes the risk of damage to the sandstone.
- Avoid Harsh Chemicals: Stick to biocide cleaning detergents designed for stone surfaces. Avoid using bleach or acidic cleaners, which can damage the sandstone.
- Be Mindful of Jointing Material: If your sandstone is laid with jointing material such as mortar, take care not to dislodge it with the pressure washer.
- Consider Professional Help: If you're unsure about any step of the process or dealing with heavily soiled or stained sandstone, consider hiring professionals like Balo Jetwash Wolverhampton for expert cleaning services.
Pressure jet washing sandstone requires careful attention to detail and the right techniques to ensure a thorough clean without causing damage. By following the steps outlined in this guide and using the right equipment and cleaning agents, you can restore the natural beauty of your sandstone surfaces. Remember, patience and precision are key to achieving professional results. Whether you're maintaining a patio, driveway, or any other sandstone feature, these tips from Balo Jetwash Wolverhampton will help you achieve a spotless and well-preserved finish.
Contact Balo Jetwash today to restore your sandstone!
📞 07902932947
📧
Information
Water available? - You don't need to be present for us to carry out the service. If required, we can supply water ourselves.
Insurance
Balo Jetwash is fully insured, We have £5,000,000 of public liability insurance. Balo Jetwash operatives are professional, reliable and endeavour to carry out the work to the highest standard with minimal fuss and upheaval.